- Support
- User Guide
- Getting Started
- Gedcom Files
TreeView User Guide
GEDCOM files
GEDCOM files are used for transferring data between different pieces of family history software. Most (if not all) family history software packages have the ability to import and export a GEDCOM file.
Importing a GEDCOM file
See 'Import an Existing Tree' for step by step instructions on importing a GEDCOM file.
Exporting a GEDCOM file
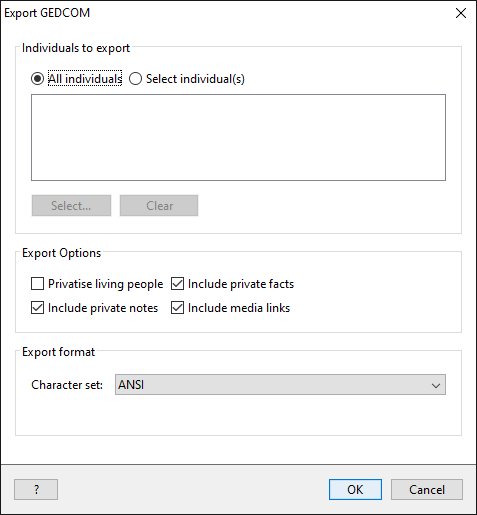
When exporting a GEDCOM file, you can choose whether you want to export your entire database or just a select number of individuals.
- Click the 'File' menu on the menu bar, then click 'Export GEDCOM'.
-
To select all individuals in your database, click 'All individuals'. If you only want to export certain individuals, click 'Select individual(s)', then click the 'Select…' button.
- To select the individuals you want to export, tick the box next to each person’s name.
- Once you have selected the people you want to export, click the 'Select' button at the bottom of the window
- You will then see their names appear in the white box below the 'Select individual(s)' option.
- In the 'Export Options' section of the window, you can tick or untick boxes to choose whether you want to include living people, private facts and notes, and multimedia links in the GEDCOM file. (Please be aware that a GEDCOM file doesn't include any media items, only the link/filepath to the media item on your computer - this means that if you send a GEDCOM file to a friend, they won't be able to see the media items that were included in your original database in TreeView.)
- Once you are ready to export the file, click 'OK'
- You will be asked where to save the GEDCOM file, browse to the location you would like to save it and click the 'Save' button.

Back to User Guide
TreeView™ ©Genealogy Supplies (Jersey) Ltd 1992-2025. All rights reserved.
